Key Terms
- Zabbix Server
- This is the core component that polls and traps data from your hosts, generates alerts, and communicates with the front end.
- MariaDB Database
- Zabbix data (items, triggers, configurations, historical data, etc.) is stored here.
- Web Front End (Apache/NGINX + PHP)
- Web Server that hosts the Zabbix UI.
Backups
Virtual Machines
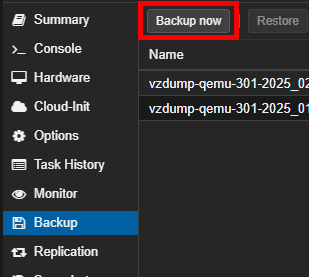
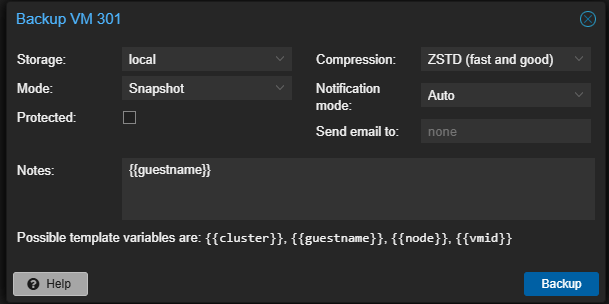
I started off by making backups of my VM’s on Proxmox. That way I can easily roll back if something doesn’t end up working.
I selected the VM.

Zabbix-HA1 & HA2
I first logged into my first HA server and switched to root.
sudo -sI then stopped the Zabbix server service.
systemctl stop zabbix-serverThen made a directory to store my backups.
mkdir /opt/zabbix-backup/Then copied the zabbix_server.conf file into the backup directory.
cp /etc/zabbix/zabbix_server.conf /opt/zabbix-backup/I also backed up the following directory.
cp -R /usr/share/zabbix/ /opt/zabbix-backup/Zabbix-DB1
I SSH’d into my database server and switched to root.
sudo -sThen made a directory for my backups.
mkdir /zabbix-db-backups/I then made a backup of my Zabbix database.
mysqldump -u root -p zabbix > /zabbix-db-backups/zabbix_backup_$(date +%F).sqlmysqldump– This is the utility provided by MySQL for creating a database backup. It generates a file with SQL statements that can be used to recreate the database structure and data.-u root– Specifies the username with which to connect to the MySQL server, in this case, ‘root’. This user must have sufficient privileges to access the entire database.-p– Signals thatmysqldumpshould prompt for the password of the MySQL user account. For security reasons, it’s a good practice not to directly include the password in the command line.zabbix– This is the name of the database to be dumped. Here, it refers to the Zabbix database, which typically contains configuration and operational data for the Zabbix monitoring system.>– This character is used to redirect the output from the command on the left (output ofmysqldump) to the file specified on the right.zabbix_back_$(date +%F).sql– Defines the filename of the backup file. It uses shell command substitution$(date +%F)to insert the current date (formatted as YYYY-MM-DD) into the filename. This helps in organizing backups by date, making it easier to locate and manage them over time.
Next, I logged into my MySql as root.
mysql -rootI then set the following variable to allow any users to create and/or modify functions.
SET GLOBAL log_bin_trust_function_creators = 1;Upgrade
Zabbix-HA1
The upgrade process on HA1 is a bit different than HA2.
I first needed to edit the zabbix_server.conf file.
sudo nano /etc/zabbix/zabbix_server.confI then scrolled to the very bottom and commented the HANodeName line.
# HANodeName=Node1Then I uninstalled my current Zabbix repository package.
rm -Rf /etc/apt/sources.list.d/zabbix.listI then downloaded the latest package.
wget https://repo.zabbix.com/zabbix/7.2/release/ubuntu/pool/main/z/zabbix-release/zabbix-release_latest_7.2+ubuntu22.04_all.debI then installed the package.
dpkg -i zabbix-release_latest_7.2+ubuntu22.04_all.debI then updated the repository.
apt updateNext, I only upgraded the zabbix-server-mysql first.
apt install --only-upgrade zabbix-server-mysqlAfter it was done, I edited the zabbix_server.conf file.
sudo nano /etc/zabbix/zabbix_server.confThen uncommented HANodeName.
HANodeName=Node1Then restarted the server.
shutdown -r nowAfter the reboot I upgraded the frontend, and Nginx conf file.
sudo apt install zabbix-frontend-php zabbix-nginx-confIf you don’t upgrade the nginx-conf file you’ll just get the Nginx default page when accessing the domain/ip address.
I now have to edit the nginx.conf file.
sudo nano /etc/zabbix/nginx.confThen added port 80, and my shared IP address and domain name.
# listen 8080;
# server_name example.com;

listen 80;
server_name 10.33.0.105 domain.com;
Then finally restarted Nginx keepalived.
sudo systemctl restart nginx keepalivedZabbix-HA2
Repeat the same steps, except commenting out HANodeName is not necessary.
Zabbix-DB1
Back on the database server, I have to revert the earlier change to mariadb.
I logged in as root.
mysql -rootThen changed it from 1 to 0.
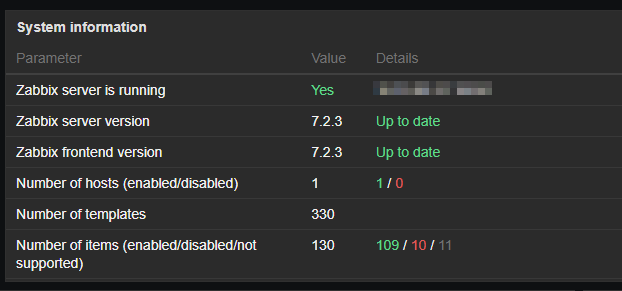
SET GLOBAL log_bin_trust_function_creators = 0;Now when I logged in it shows my server and frontend versions are up to date.