Prerequisites
- 3 Ubuntu 22.04 VMs
My Setup
| Server Name | OS | IP Address | Resources |
|---|---|---|---|
| Zabbix-HA1 | Ubuntu 22.04 LTS | 10.33.99.101 | 4 cores | 8GB RAM | 40GB storage |
| Zabbix-HA2 | Ubuntu 22.04 LTS | 10.33.99.102 | 4 cores | 8GB RAM | 40GB storage |
| Zabbix-DB1 | Ubuntu 22.04 LTS | 10.33.99.103 | 4 cores | 8GB RAM | 60GB storage |
| Virtual IP | 10.33.99.105 |
- For this setup, I used 3 servers. 1 for the database, and 2 for the Zabbix frontend. I also utilized Nginx to setup a virtual IP that will be used by both Zabbix frontend servers.
Installation
Zabbix-DB1
First, I SSH’d into the server I’ll be using as the database.
Then I downloaded the MariaDB repo.
wget https://downloads.mariadb.com/MariaDB/mariadb_repo_setup
chmod +x mariadb_repo_setup
sudo ./mariadb_repo_setup
Then I installed MariaDB, and enabled it to start upon boot.
sudo apt install mariadb-server
sudo systemctl enable mariadb
sudo systemctl start mariadbMariaDB has a script that helps improve security.
You can run the following command and follow the prompts to better secure it.
sudo mariadb-secure-installation
Next I logged into MariaDB as root.
mariadb -u root -pI then created the database and users for zabbix-ha1, zabbix-ha2, and the virtual IP I’ll be setting up later.
create database zabbix character set utf8mb4 collate utf8mb4_bin;

create user zabbix@'10.33.99.101' identified by 'top_secret_password';
create user zabbix@'10.33.99.102' identified by 'top_secret_password';
create user zabbix@'10.33.99.105' identified by 'top_secret_password';

grant all privileges on zabbix.* to 'zabbix'@'10.33.99.101' identified by 'top_secret_password';
grant all privileges on zabbix.* to 'zabbix'@'10.33.99.102' identified by 'top_secret_password';
grant all privileges on zabbix.* to 'zabbix'@'10.33.99.105' identified by 'top_secret_password';

set global log_bin_trust_function_creators = 1;
quit;10.33.99.101– The IP address of my zabbix-ha1 server.10.33.99.102– The IP address of my zabbix-ha2 server.10.33.99.105– The virtual IP address I’ll be setting up with Nginx.set global ..– Temporarily allows creation of functions (required when importing the schema).
I then installed the Zabbix repository and SQL Scripts, which are used during the installation and configuration of a Zabbix server.
wget https://repo.zabbix.com/zabbix/7.0/ubuntu/pool/main/z/zabbix-release/zabbix-release_7.0-1+ubuntu22.04_all.deb
sudo dpkg -i zabbix-release_7.0-1+ubuntu22.04_all.deb
sudo apt update
sudo apt install zabbix-sql-scripts
Then ran the import.
zcat /usr/share/zabbix-sql-scripts/mysql/server.sql.gz | mysql --default-character-set=utf8mb4 -u root -p zabbixzcat– Decompresses the Zabbix SQL schema.| mysql --default ...– Pipes and imports it into the ‘zabbix’ database.
After the imported completed I disabled the log_bin trust.
mysql -u root -p
set global log_bin_trust_function_creators = 0;
quit;
Zabbix-HA1
Zabbix server will be installed on both Zabbix-HA1 and Zabbix-HA2.
First, I downloaded and added the Zabbix 7.0 repository.
wget https://repo.zabbix.com/zabbix/7.0/ubuntu/pool/main/z/zabbix-release/zabbix-release_7.0-1+ubuntu22.04_all.deb
sudo dpkg -i zabbix-release_7.0-1+ubuntu22.04_all.deb
sudo apt update
Then I installed the server package along with MySQL database support.
sudo apt install zabbix-server-mysqlNext, I needed to make some changes to the .conf file.
sudo nano /etc/zabbix/zabbix_server.confI found the following lines and filled them out accordingly.
DBHost=10.33.99.103
DBUser=zabbix
DBPassword=passwordDBHost– I put the IP address of the zabbix-db1 server.DBUser– I left it as ‘zabbix’.DBPassword– I changed this to the password I setup earlier.
I scrolled to the very bottom of the file and uncommented the following lines.
HANodeName=zabbix-ha1
NodeAddress=10.33.99.101HANodeName– I put the name of the server (It doesn’t have to be the name of the server but I like to keep consistency).NodeAddress– The IP address of this server (zabbix-ha1).
Then saved and exited.
CTRL + X
'Enter'
Y
Zabbix-HA2
Now to do the same on Zabbix-HA2 with some minor changes.
Once again I downloaded and added the Zabbix 7.0 repository.
wget https://repo.zabbix.com/zabbix/7.0/ubuntu/pool/main/z/zabbix-release/zabbix-release_7.0-1+ubuntu22.04_all.deb
sudo dpkg -i zabbix-release_7.0-1+ubuntu22.04_all.deb
sudo apt update
Then I installed the server package along with MySQL database support.
sudo apt install zabbix-server-mysqlNext, I needed to make some changes to the .conf file.
sudo nano /etc/zabbix/zabbix_server.confI found the following lines and filled them out accordingly.
DBHost=10.33.99.103
DBUser=zabbix
DBPassword=passwordDBHost– I put the IP address of the zabbix-db1 server.DBUser– I left it as ‘zabbix’.DBPassword– I changed this to the password I setup earlier.
Here’s where the minor differences are. I scrolled to the very bottom of the file and filled these lines as follows.
HANodeName=zabbix-ha2
NodeAddress=10.33.99.102HANodeName– I put the name of the server (It doesn’t have to be the name of the server but I like to keep consistency).NodeAddress– The IP address of this server (zabbix-ha2).
Then I enabled Zabbix to start on boot and to started the service on both ha1 and ha1.
sudo systemctl enable zabbix-server
sudo systemctl start zabbix-server
Nginx
This will be setup on both ha1 and ha2 servers, again with some minor differences on each.
First, I installed ‘keepalived’ on both servers.
sudo apt install keepalivedThen created the following .conf file on both servers.
sudo nano /etc/keepalived/keepalived.confOn zabbix-ha1 I configured the conf. file as the master.
vrrp_track_process chk_nginx {
  process nginx
  weight 10
}

vrrp_instance ZBX_1 {
  state MASTER
  interface ens18
  virtual_router_id 51
  priority 244
  advert_int 1
  authentication {
    auth_type PASS
    auth_pass top_secret_password
  }
  track_process {
    chk_nginx
  }
  virtual_ipaddress {
    10.33.99.105/24
  }
}state– I changed this to MASTER. This node start with higher priority.interface– I changed this to the name of the server’s interface name.priority– I changed this to 244.auth_pass– I entered a secure password.virtual_ipaddress– The IP address I’m going to use to access Zabbix.
On zabbix-ha2 there’s a few differences.
vrrp_track_process chk_nginx {
  process nginx
  weight 10
}

vrrp_instance ZBX_1 {
  state BACKUP
  interface ens18
  virtual_router_id 51
  priority 243
  advert_int 1
  authentication {
    auth_type PASS
    auth_pass top_secret_password
  }
  track_process {
    chk_nginx
  }
  virtual_ipaddress {
    10.33.99.105/24
  }
}state– I changed this to BACKUP. This node start with lower priority.interface– I changed this to the name of the server’s interface name.priority– I changed this to 243.auth_pass– I entered a secure password.virtual_ipaddress– The IP address I’m going to use to access Zabbix.
On both servers I installed the Zabbix frontend.
sudo apt install nginx zabbix-frontend-php zabbix-nginx-confnginx– Installs the Nginx web server, which will server the Zabbix frontend.zabbix-frontend-conf– Installs the PHP frontend for Zabbix.zabbix-nginx-conf– Installs the configuration files needed to set up Zabbix with Nginx.
I then edited the following .conf file on both servers.
sudo nano /etc/zabbix/nginx.confI then uncommented the following lines and changed the port and server name (this will be the same on both ha1 and ha2).
# listen 8080;
# server_name example.com;

listen 80;
server_name 10.33.0.105;
Then finally enabled Nginx and keepalived to start on boot, and started the services.
sudo systemctl enable nginx keepalived
sudo systemctl start nginx keepalived
Frontend
To setup the front end, I’ll have to go through the initial Zabbix configuration twice. The first will be on ha1, then stopping Nginx on ha1, and repeating it for ha2. But, I’ll be doing it from the virtual IP I setup, and not the server’s individual IP addresses.
First, I went to the virtual IP address I configured.
http://10.33.99.105/First page will be the language select.
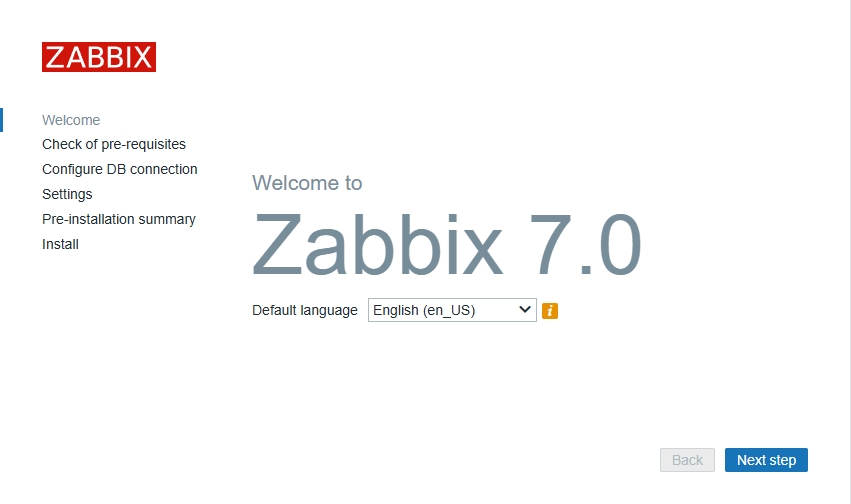
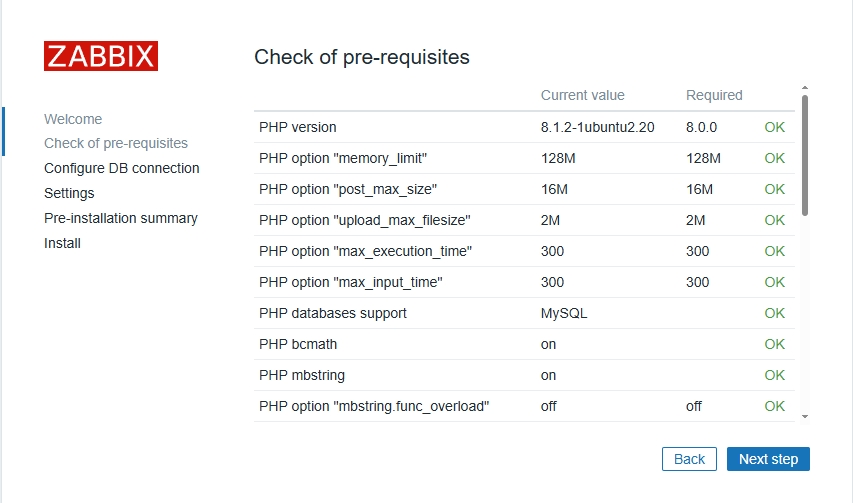
I verified everything was ‘OK’.
Then I configured the database connection.
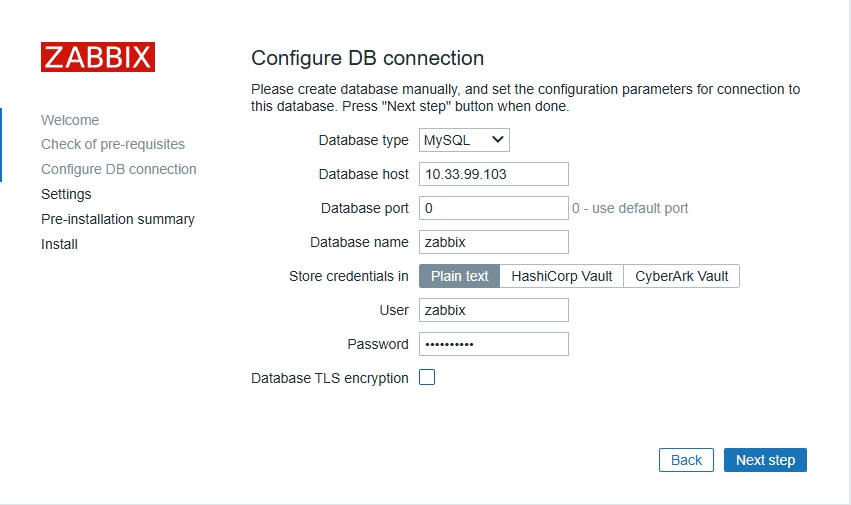
Database host– I inputed the IP address of zabbix-db1.Password– The password I setup for the database in MariaDB.Database TLS encryption– I unchecked this.
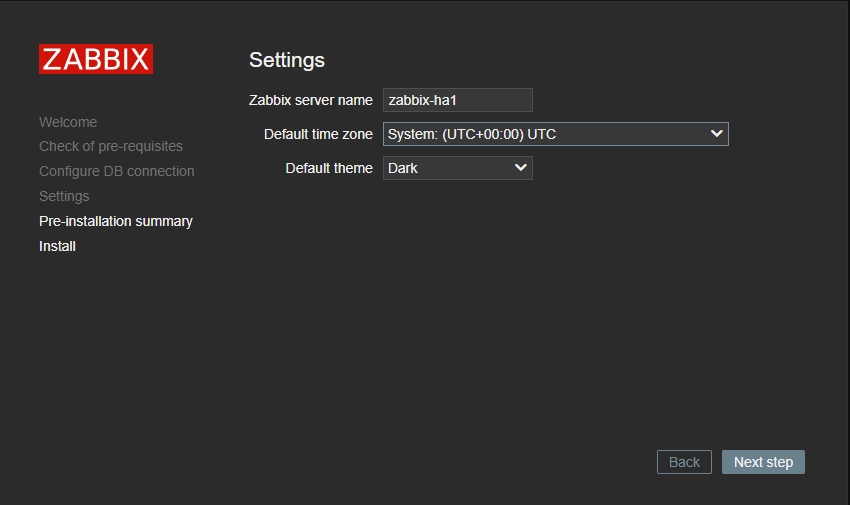
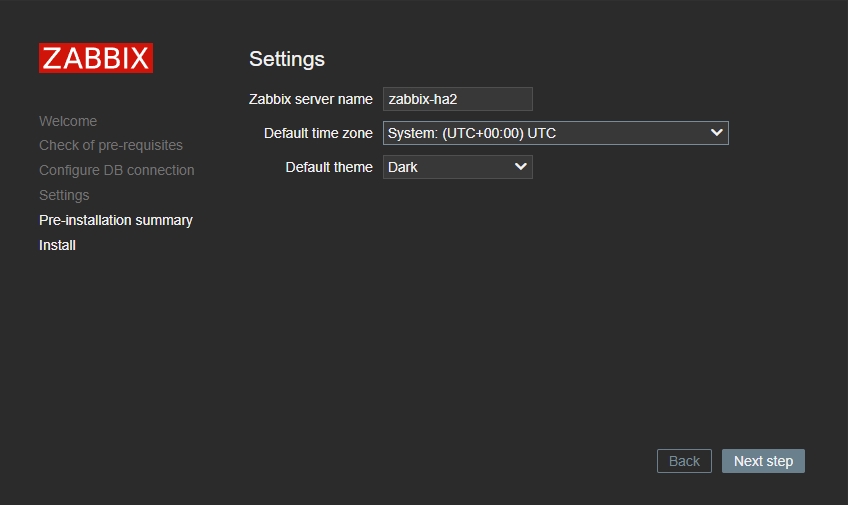
Then I named it after zabbix-ha1.
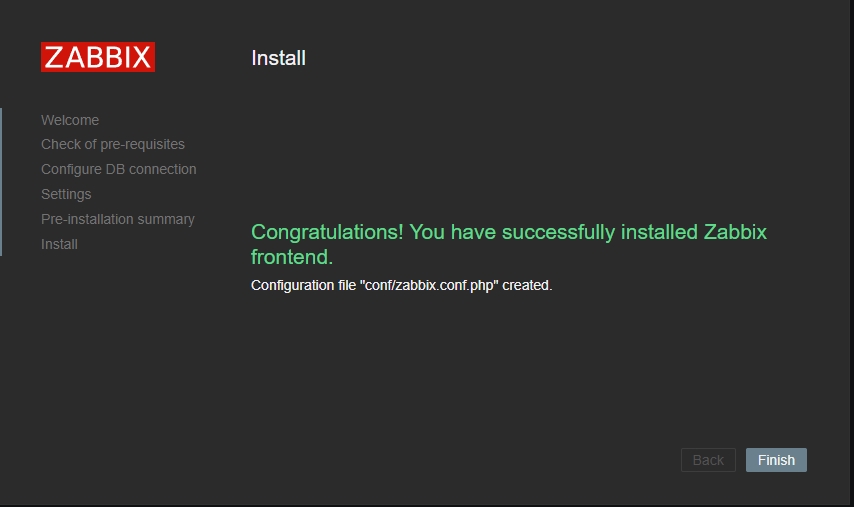
Summary page.

Then clicked ‘Finish’.
I then stopped Nginx on zabbix-ha1.
sudo systemctl stop nginxThen went back to the virtual IP address.
http://10.33.99.105/And did everything the same as earlier.
The only difference is that I made sure to name it after zabbix-ha2.
Then I went back to zabbix-ha1 and started Nginx.
Here’s what to do if you get an error about an unsupport MariaDB version.
Edit the following conf file on each zabbix-ha server.
sudo nano /etc/zabbix/zabbix_server.confScroll down, uncomment and change the following from 0 to 1
AllowUnsupportedDBVersion=1Then restart zabbix-server.
sudo systemctl restart zabbix-server