IP Address Management
NetBox gives network and infrastructure teams a centralized “source of truth” for everything with an IP address or a rack elevation. Through a modern web UI (and both REST + GraphQL APIs), you can model sites, racks, power and circuit paths, devices, interfaces, VLANs, IP prefixes, and VRFs (then track changes with role-based permissions, custom fields, and automated webhooks). The platform is plugin-friendly, ties neatly into Ansible, Terraform, and CI/CD pipelines, and doubles as live documentation for audits, capacity planning, and network automation.


‣ Prerequisites
• Server
• Domain Name
• Firewall
Installation
PostgreSQL
This part goes over installaing PostgreSQL as the database. Ubuntu 22.04 comes with PostgreSQL 14 by default, which meets NetBox’s requirement of PostgreSQL 14+
First, I installed the PostgreSQL server:
					sudo apt update
sudo apt install -y postgresql
Then logged into the shell as root:
sudo -u postgres root
I then ran the following commands to create a database, user, and set permissions:
					CREATE DATABASE netbox;
CREATE USER netbox WITH PASSWORD '<DB_PASSWORD>';
ALTER DATABASE netbox OWNER TO netbox;
GRANT CREATE ON SCHEMA public TO netbox;
\q
Line 1: Creates a database called “netbox”.Line 2: Creates a user named netbox and sets their password.Line 3: Sets the use netbox as the owner of the database.
Then I tested the database:
psql --username netbox --password --host localhost netbox
Redis
This section goes over installing Redis, which NetBox uses for caching and background task queueing.
First, I installed the Redis server:
sudo apt install -y redis-server
Now I needed to set a password, so I opened the cli:
redis-cli
Then set a password:
127.0.0.1:6379> ACL SETUSER default ><REDIS_PASSWORD>
I then verified with the following commands:
					127.0.0.1:6379> AUTH <REDIS_PASSWORD>
OK
127.0.0.1:6379> PING
PONG
127.0.0.1:6379>exit
Netbox
This part goes over downloading and installing Netbox.
First, I installed the required system packages.
					sudo apt install -y python3 python3-pip python3-venv python3-dev \
    build-essential libxml2-dev libxslt1-dev libffi-dev libpq-dev \
    libssl-dev zlib1g-dev git
I then made a directory to install Netbox, and cloned the Github repo:
					sudo mkdir -p /opt/netbox
sudo git clone -b master --depth 1 https://github.com/netbox-community/netbox.git /opt/netbox
Next, I created a dedicated, non-login user to run NetBox services:
sudo adduser --system --group netbox
I then assigned ownership of important directories to this user so that NetBox can write media and reports:
sudo chown -R netbox /opt/netbox/netbox/media/ /opt/netbox/netbox/reports/ /opt/netbox/netbox/scripts/
I then made a copy of the example configuration file:
					cd /opt/netbox/netbox/netbox/
sudo cp configuration_example.py configuration.py
Now I needed to edit that file:
sudo nano configuration.py
I then set the domain name and IP address, so it’s accessible externally and internally.
ALLOWED_HOSTS = ['netbox.example.com', '192.0.2.123']
I then inputted the database name, user name and password:
					DATABASES = {
    'default': {
        'ENGINE': 'django.db.backends.postgresql',  # PostgreSQL backend
        'NAME': 'netbox',       # Database name
        'USER': 'netbox',       # Database user
        'PASSWORD': '<DB_PASSWORD>',   # DB user password
        'HOST': 'localhost',    # Database host
        'PORT': '',             # Default port 5432
        'CONN_MAX_AGE': 300,    # Keep DB connections open for performance
    }
}
Line 4: Database name created earlier.Line 5: User created earlier.Line 6: Password for said user.
Then I configured the Redis connection details for caching and task queues:
					REDIS = {
    'tasks': {    # Redis DB 0 for RQ tasks
        'HOST': 'localhost',
        'PORT': 6379,
        'PASSWORD': '<REDIS_PASSWORD>',
        'DATABASE': 0,
        'SSL': False,
    },
    'caching': {  # Redis DB 1 for caching
        'HOST': 'localhost',
        'PORT': 6379,
        'PASSWORD': '<REDIS_PASSWORD>',
        'DATABASE': 1,
        'SSL': False,
    }
}
At this point I saved the file and exited, that way I can generate a secret key:
python3 ../generate_secret_key.py
I then opened the config file again and inputted the generated key:
SECRET_KEY = '<generated-secret-key>'
I then ran upgrade.sh (a script that comes with Netbox) which sets up the Python virtual environment, installs required packages, applies database migrations, and collects static files:
sudo /opt/netbox/upgrade.sh
I then activated the vitrual environment and changed to the netbox directory:
					source /opt/netbox/venv/bin/activate
cd /opt/netbox/netbox/
From here I created a superuser that will be able to log into Netbox’s web UI with full admin rights:
python3 manage.py createsuperuser
Next, I enabled a task that is included with NetBox that cleans up old session data and other maintenance tasks by linking the script to cron.daily.
sudo ln -s /opt/netbox/contrib/netbox-housekeeping.sh /etc/cron.daily/netbox-housekeeping
Gunicorn
For production, I’ll run NetBox as a WSGI application using Gunicorn (which was installed by the upgrade script) and manage it with systemd. We’ll also run NetBox’s background worker process (NetBox uses RQ worker for Redis tasks) under systemd.
I copied the example Gunicorn script into Netbox’s root directory:
sudo cp /opt/netbox/contrib/gunicorn.py /opt/netbox/gunicorn.py
Next, I installed systemd service unit files for both the main app (gunicorn) and the RQ worker:
					sudo cp -v /opt/netbox/contrib/*.service /etc/systemd/system/
sudo systemctl daemon-reload
I then started the services and enabled to start on boot:
sudo systemctl enable --now netbox netbox-rq
I checked both services to make sure they’re running correctly:
					systemctl status netbox
systemctl status netbox-rq
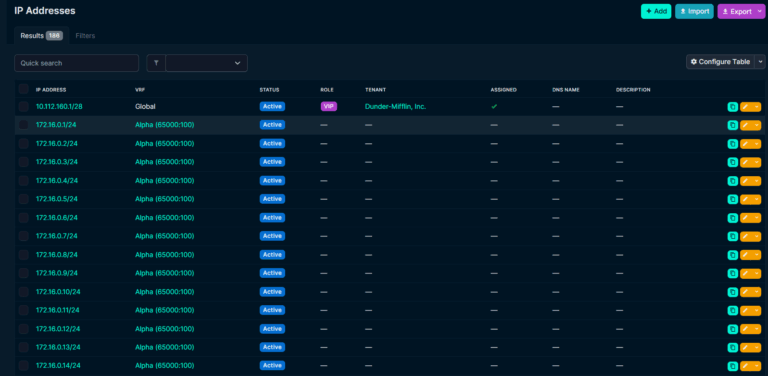
Netbox should now be accessible internally.
Domain
Cloudflare
(placeholder)
pfSense
(placeholder)
HAProxy
(placeholder)