IT Asset Management
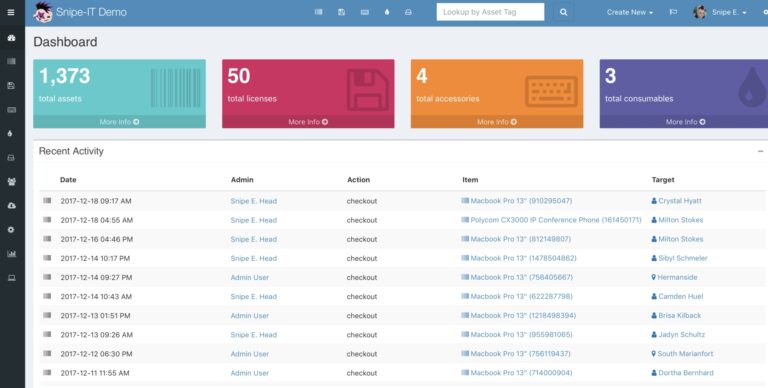
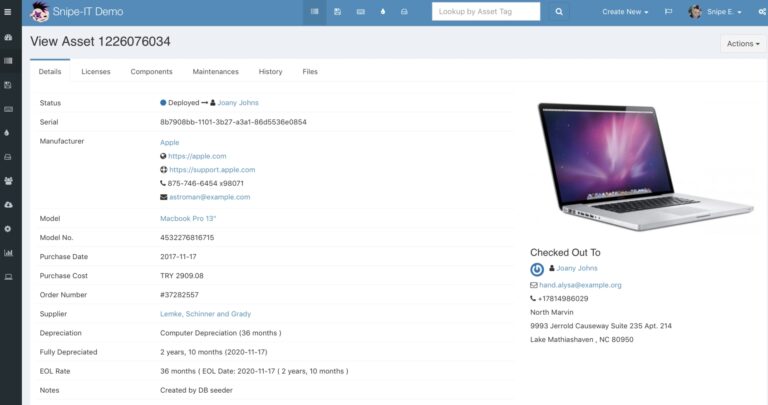
Snipe-IT gives IT teams a clean web interface (and REST API) for tracking everything with a serial number (laptops, monitors, peripherals, software licenses, consumables, warranties, and check-in/out history). The app is mobile-friendly, generates barcodes for quick scanning, and supports SAML, Slack, and JAMF integrations.
‣ Prerequisites
• Server
• Domain Name
• Firewall
Installation
Initial Setup
This section I’ll show the initial setup on the Ubuntu 22.04 server.
I started by updating the server’s package list and upgrading existing packages to the latest versions:
sudo apt update && sudo apt upgrade -y
Ubuntu’s default repos don’t have PHP 8.2 yet, so I’ll use the well-maintained Ondřej Surý PPA:
					sudo apt install -y software-properties-common
sudo add-apt-repository ppa:ondrej/php -y
sudo apt update
Next, I pull in PHP 8.2 plus every extension Snipe-IT relies on (database driver, image libraries, LDAP, ZIP, SOAP, and more):
					sudo apt install -y php8.2 php8.2-fpm php8.2-cli \
  php8.2-common php8.2-mysql php8.2-gd php8.2-curl php8.2-mbstring \
  php8.2-xml php8.2-zip php8.2-bcmath php8.2-intl php8.2-ldap \
  php8.2-imagick php8.2-soap php8.2-xsl
Ngnix
This part sets up Nginx, which I’ll use as the web server that sits in front of Snipe-IT.
Nginx’s job is to listen for every browser request, quickly hand back static files (CSS / JS / images), and forward any PHP pages to PHP-FPM for processing.
Install Nginx, which will serve the Snipe-IT web interface:
sudo apt install -y nginx
Once installed, verify Nginx is running and enable it to start on boot:
					sudo systemctl enable --now nginx
sudo systemctl status nginx
I then check the PHP version and that FPM is running:
					php -v
sudo systemctl status php8.2-fpm
MariaDB
This part installs MariaDB, the MySQL-compatible database engine that will hold everything Snipe-IT cares about (assets, users, check-out history, attachments, and settings).
I started by installing the MariaDB server and client tools:
sudo apt install -y mariadb-server mariadb-client
I then enabled MariaDB to start on boot and checked the status:
					sudo systemctl enable --now mariadb
sudo systemctl status mariadb
Then I ran the included security script to set a root password and remove insecure defaults:
sudo mysql_secure_installation
You will be prompted to configure the following (it’s recommended to answer as below):
- Set root password? – Yes, set a strong password for the MariaDB root user.
- Remove anonymous users? – Yes (disallow anonymous database access).
- Disallow root login remotely? – Yes (local root only, improves security).
- Remove test database and access to it? – Yes (cleanup).
- Reload privilege tables now? – Yes.
Next, I logged into MariaDB as root.
sudo mysql -u root -p
And created the database and user.
					CREATE DATABASE snipeit_db CHARACTER SET utf8mb4 COLLATE utf8mb4_unicode_ci;
CREATE USER 'snipeit_user'@'localhost' IDENTIFIED BY 'StrongPasswordHere';
GRANT ALL PRIVILEGES ON snipeit_db.* TO 'snipeit_user'@'localhost';
FLUSH PRIVILEGES;
EXIT;
Line 1: Creates a new database named snipeit_db using the modern utf8mb4 character set (full-Unicode) and its recommended collation, so Snipe-IT can store any emoji or multilingual text without corruption.Line 2: Adds a dedicated MySQL account called snipeit_user that can connect only from the local host and must supply the password you choose.Line 3: Gives that user full rights (SELECT, INSERT, UPDATE, DELETE, etc.) on every table inside snipeit_db so the application can manage its own schema while keeping the rest of the server locked down.Line 4: Tells MySQL to reload its in-memory privilege tables immediately, making the new user and grants effective without a restart.
Composer
This part installs Composer, the PHP dependency manager that fetches and keeps track of all the third-party libraries Snipe-IT relies on (Laravel framework, security packages, image handlers, etc.).
First I make sure curl is present, then pipe the installer straight into PHP and move the resulting binary to /usr/local/bin/composer.
					sudo apt install -y curl
curl -sS https://getcomposer.org/installer | php
sudo mv composer.phar /usr/local/bin/composer
I verified everything installed correctly by checking the version:
composer --version
Snipe-IT
This part shows the final touches on the server side in getting Snipe-IT installed and running.
First, I changed to the web root directory and cloned the Snipe-IT repo.
					cd /var/www
sudo git clone https://github.com/snipe/snipe-it.git snipe-it
By default, the files are owned by root (since I used sudo). This command gives me ownership temporarily. I will later assign ownership to the web server user:
sudo chown -R $USER:$USER /var/www/snipe-it
I then moved to the snipe-it web directory and made a copy of the .env file:
					cd /var/www/snipe-it
cp .env.example .env
I now needed to edit the copied .env file:
sudo nano /var/www/snipe-it/.env
I made sure APP_ENV was set to production, and changed the APP_URL to the domain I will be creating later.
					APP_ENV=production
APP_DEBUG=false
APP_URL="https://snipit.tech"
I also set the timezone:
APP_TIMEZONE="America/Chicago"
I also changed the database, username, and password to match what I setup earlier:
					DB_DATABASE=snipeit_db
DB_USERNAME=snipeit_user
DB_PASSWORD=StrongPasswordHere
DB_HOST=127.0.0.1
DB_PORT=3306
I then configured the email settings so that users are able to request password resets, alerts, etc.
					MAIL_HOST=smtp.snipeit.tech
MAIL_PORT=587
MAIL_USERNAME=tech@snipeit.tech
MAIL_PASSWORD=EmailPassword
MAIL_ENCRYPTION=tls
MAIL_FROM_ADDR=asset-management@snipeit.tech
MAIL_FROM_NAME="Snipe-IT Asset Manager"
Next, I installed Snipe-IT’s PHP libraries via Composer.
					cd /var/www/snipe-it
composer install --no-dev --optimize-autoloader
This will download and install all required PHP dependencies (Laravel framework files and others) as defined in Snipe-IT’s composer.json. The --no-dev flag skips installing development/testing packages, and --optimize-autoloader improves performance for autoloading classes.
I then generated an application key:
php artisan key:generate
Once Composer finishes, generate a unique app key, which is used for encryption and session security.
I then set the ownership of the directory to www-data.
sudo chown -R www-data:www-data /var/www/snipe-it
I then set the directory to be executable and readable:
sudo chmod -R 755 /var/www/snipe-it
I then secured the .env file to only allow the owner (www-data) to be able to read it:
sudo chmod 640 /var/www/snipe-it/.env
Next, I deleted the default site so it wouldn’t cause any conflicts:
sudo rm /etc/nginx/sites-enabled/default
I then created the configuration file for Snipe-IT:
sudo nano /etc/nginx/sites-available/snipeit.conf
And pasted the following:
					server {
    listen 80;
    server_name snipeit.tech;
    root /var/www/snipe-it/public;

    index index.php index.html index.htm;

    location / {
        try_files $uri $uri/ /index.php?$query_string;
    }

    location ~ \.php$ {
        include snippets/fastcgi-php.conf;
        fastcgi_pass unix:/var/run/php/php8.2-fpm.sock;
    }

    # Deny access to .htaccess (Apache dotfiles) if present
    location ~ /\.ht {
        deny all;
    }
}
Line 3: I changed this to match the server name I will be setting up.Line 14: I also made sure to change php8.1 to php8.2.
Then created a symlink in sites-enabled to active this config:
sudo ln -s /etc/nginx/sites-available/snipeit.conf /etc/nginx/sites-enabled/
I tested Nginx for any syntax errors:
sudo nginx -t
After confirming there were no syntax errors I reloaded Nginx:
sudo systemctl reload nginx
template_groups– This will add it to the ‘Templates/Modules’ and ‘Templates/Operating systems’ groups.templates– This will give it the name ‘Windows LibreHardwareMonitor Discovery’.discovery_ruleslhm_discovery– The item key used by Zabbix to execute this discovery.{#ID_WMI}Contains conditions that refine which discovered entities are considered valid.ZABBIX_ACTIVE– Specifies that this is an active check, meaning the agent sends data to the server.
Web Interface
Domain
This part will show 2 different ways to setup a domain name. 1 using an A Record pointing to your public IP and using pfSense with HAProxy, the other is using a Cloudflare Tunnel.
Cloudflared Tunnel
To setup a Cloudflare Tunnel, I went to Zero Trust > Networks > Tunnels > Create Tunnel > Cloudflared
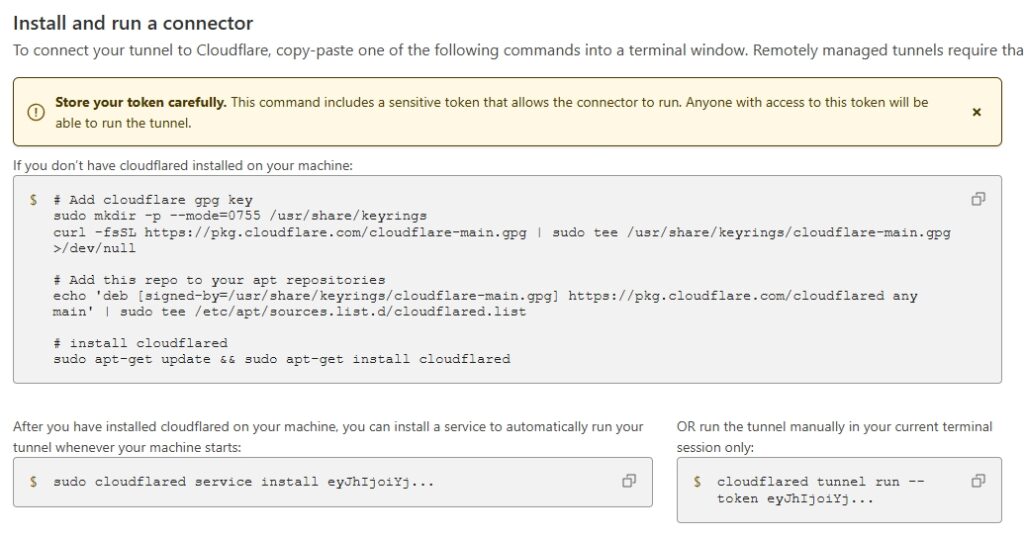
Then selected Debian.

Then it’ll give you commands to enter.
Then specified the subdomain, selected HTTP, and entered the local IP address of the server.

Snipe-IT should now be accessible through the domain name.
A Record
I won’t go over the firewall rules I have in place right now, just because it’s a lot to cover. If you’re not familiar with firewall rules then using a Cloudflared Tunnel will be a lot easier.
To setup an A Record I went to Overview > DNS > Records
I then typed in my desired subdomain, and my public IP address.

Then on my pfSense firewall I went to Services > Acme > Account Keys > Add
I then:
Name: Gave the cert an easily identifiable name.Description: Gave a short description.Email: Even though it’s not in the screen shot, I entered an email address to receive notifications.Account key: This box will be empty until you click on ‘Create new account key’.Register ACME account key: I clicked this after the key was generated.

Then I clicked on the ‘Certificates’ tab and created a new certificate:
Name: Gave it an easily identifiable name.Description: A short description.Acme Account: I selected the Key I created earlier from the drop down menu.

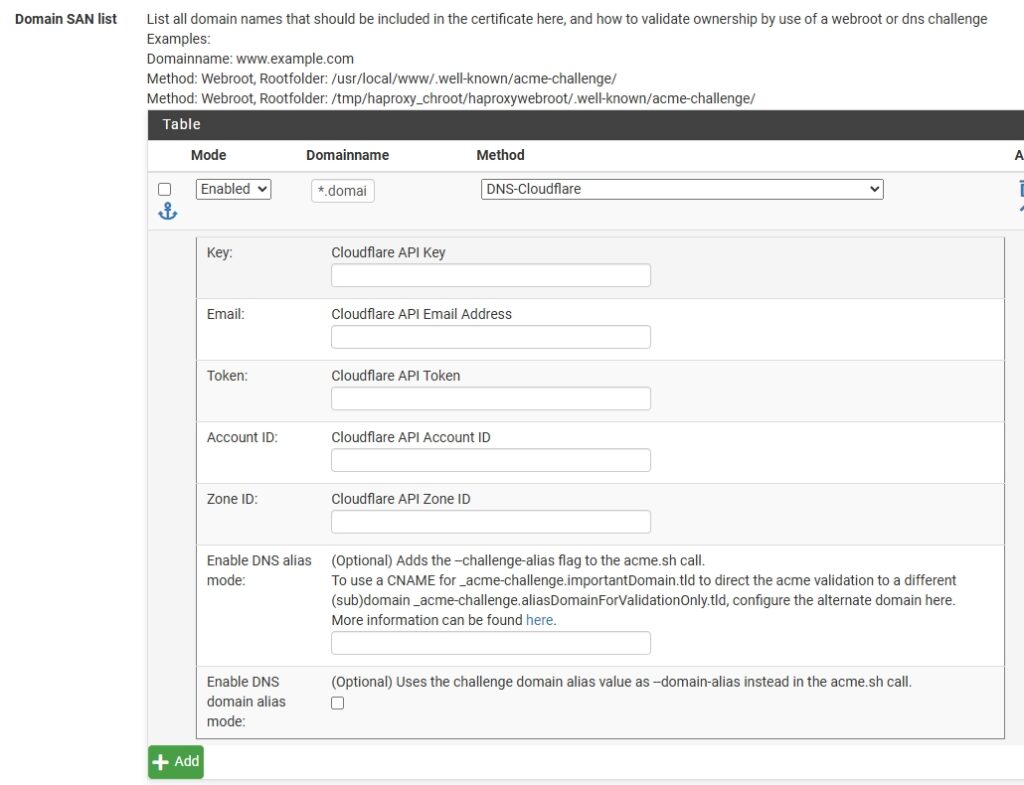
On the Domain SAN list section:
Domainname: I entered ‘*.domainname.com’ and selected ‘DNS-Cloudflare’ from the drop down menu.- The
Key,Email,Token,Account ID, andZone IDwill be found in Cloudflare.
Next I need to setup HAProxy, so I went to Services > HAProxy > Backend > Add.
Edit HAproxy Backend server pool:
Name: Easy identifiable name.- Server list
Mode: activeName: subdomain name.Forwardto: Address+ProxyAddress: Internal IP address of the server.Port: Port 80

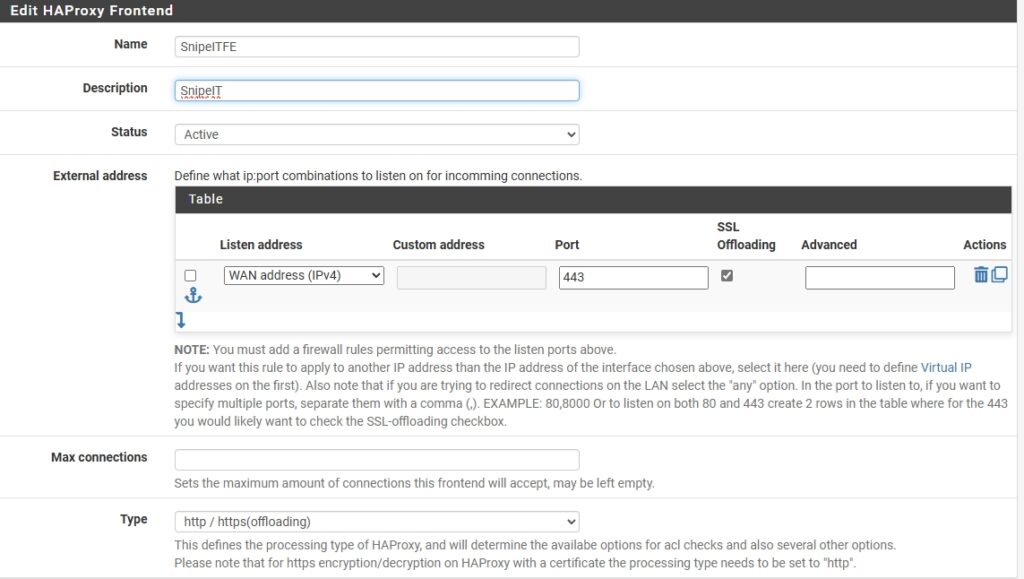
Next is to setup the Frontend, so I clicked on the Frontend tab and clicked ‘Add’:
Name: Easily identifiable name.Status: Active- External address:
Listen address: WAN addressPort: 443SSL Offboarding: Uncheck this (screenshot shows it’s checked).
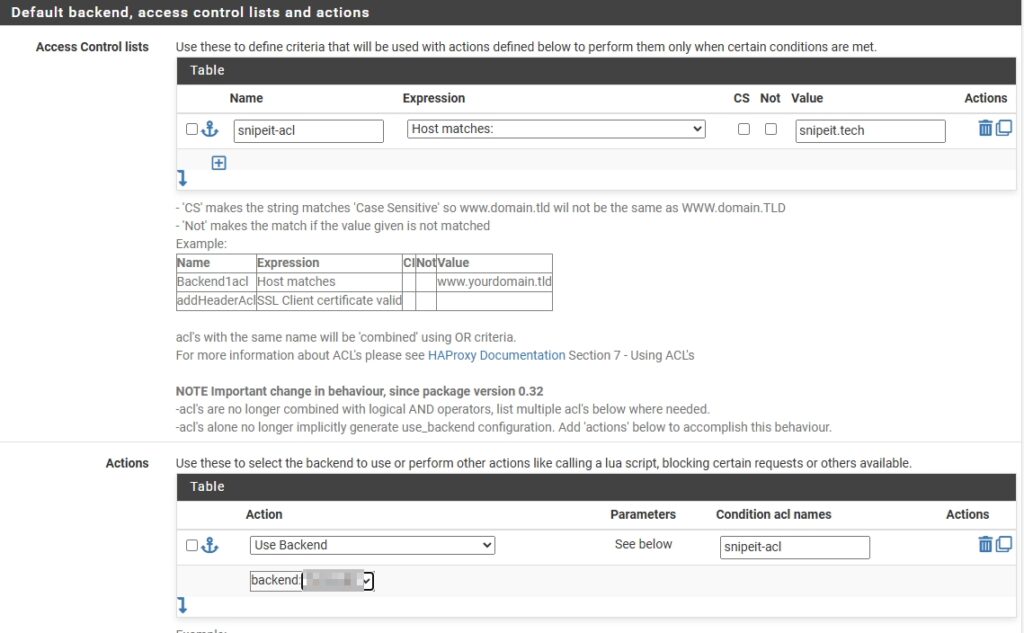
- Access Control lists:
Name: Give the ACL a simple name.Expression: Host matchesValue: domain name
- Actions
Action: Use Backend, then select the backend created earlier from the drop down list.Condition acle names: Enter the name of the ACL made above.
- Additional certificates
Certificates: Select the certificate created earlier from the drop down list.

Snipe-IT should now be accessible from the domain name.
Snipe-IT Setup
This part shows the final stages of setting up Snipe-IT once you access the domain for the first time.
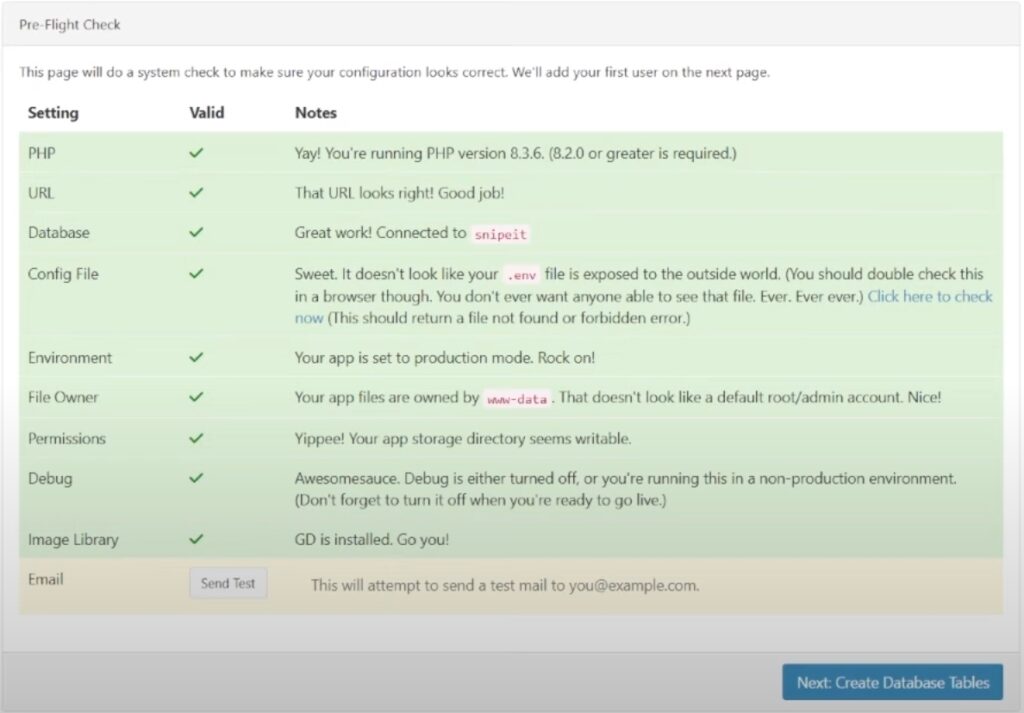
I then went to my domain name, and this check will automatically pop up, and it will inform you of anything you need to fix.
After clicking ‘Create Database Tables’ you get a success message like this.

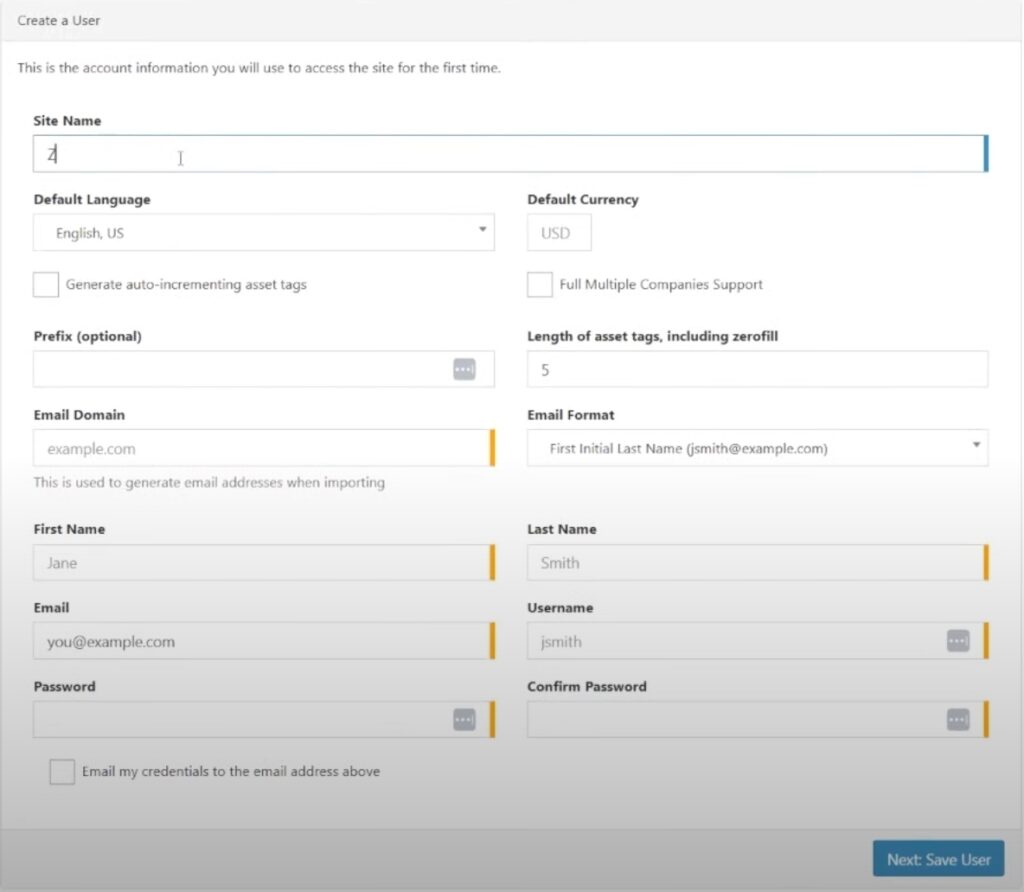
Creating the user page is self explanatory.
And finally, Snipe-IT is now setup.

In the next blog posts I’ll show how I setup inventory, used to Snipe-Scan to check-in/out items, how I integrated it with JAMF, and more.
