Table of Contents
Here I install Wazuh as my XDR and SIEM. It’s a tool I use along with Graylog to monitor endpoints, networks, and helps me setup group policies.
These blog posts aren’t really meant as a tutorial, more so to demonstrate how I set it up in my environment, as well as documentation so I can look back if necessary.
Screenshots
Virtualized on Hyper-V
Operating System: Ubuntu 22.04
CPU: 4 cores
RAM: 8192MB
Storage: 100GB
IP: 10.33.99.81/24
Virtualized on Hyper-V
Operating System: Ubuntu 22.04
CPU: 4 cores
RAM: 8192MB
Storage: 100GB
IP: 10.33.99.82/24
Virtualized on Hyper-V
Operating System: Ubuntu 22.04
CPU: 2 cores
RAM: 4096MB
Storage: 50GB
IP: 10.33.99.83/24
Wazuh Indexer
Initial Server Configuration
First, I created a new user that way I don’t have to login as ‘root‘.
adduser nesto
Then I gave that user ‘sudo‘ privileges.
usermod -aG sudo nesto
You can check which groups are assigned to that user by entering this command.
groups nesto
Then I updated packages.
apt-get update -y
And upgraded packages.
apt upgrade -y
I then rebooted the server to apply any updates that needed to be done after a restart.
shutdown -r now
Creating SSH Key
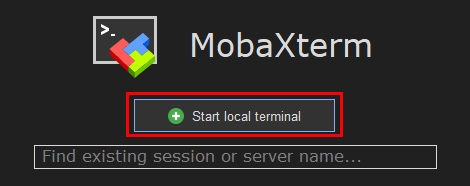
First I started Mobaxterm, and clicked on ‘Start local terminal‘.

Then I created ssh keys with default settings, and saved it it in the default location.
ssh-keygen
Then copied the public key to the server.
ssh-copy-id nesto@10.33.99.71
Now I can SSH without needing to enter a password.
ssh nesto@10.33.99.71
Certificates Creation
I then downloaded the wazuh-certs-tool.sh script from Wazuh’s package repository.
curl -sO https://packages.wazuh.com/4.3/wazuh-certs-tool.sh
-s : prevents curl from outputting progress or error messages.
-O : tells curl to save the downloaded file with the same filename.
I then downloaded the wazuh-certs-tool.sh script from Wazuh’s package repository.
curl -sO https://packages.wazuh.com/4.3/config.yml
I then made some changes to the yml file.
sudo nano config.yml
Indexer
Name: I used the hostname for this server which is wazuh-indexer.
IP: I entered the IP for this server which is 10.33.99.81
Server
Name: I entered the hostname for the server I’ll be creating which will be wazuh-server.
IP: I entered the IP I’ll be setting up.
Dashboard
Name: I’ll be setting up the dashboard on it’s own server as well named wazuh-dashboard.
IP: Then specified the IP I’ll be using.
					nodes:
  # Wazuh indexer nodes
  indexer:
    - name: wazuh-indexer
      ip: 10.33.99.81
    # - name: node-2
    #   ip: <indexer-node-ip>
    # - name: node-3
    #   ip: <indexer-node-ip>
# Graylog server nodes
  # Use node_type only with more than one Wazuh manager
  server:
    - name: wazuh-server
      ip: 10.33.99.82
    # node_type: master
    # - name: wazuh-2
    #   ip: <wazuh-manager-ip>
    # node_type: worker
# Wazuh dashboard node
  dashboard:
    - name: wazuh-dashboard
      ip: 10.33.99.83
Then I ran the following to create certificates.
bash ./wazuh-certs-tool.sh -A
Then created an archive file named ‘wazuh-certificates.tar‘, which contains all files and subdirectories located in ‘./wazuh-certificates/‘.
					tar -cvf ./wazuh-certificates.tar -C ./wazuh-certificates/ .
rm -rf ./wazuh-certificates
Install
Then I installed the following 3 packages: debconf, adduser, and procps.
sudo apt-get install debconf adduser procps
debconf : used to handle the configuration of packages during their installation.
adduser : simplifies adding new users and groups to the system.
procps: contains utilities for monitoring the system’s processes.
And installed 2 more packages: gnupg and apt-transport-https
sudo apt-get install gnupg apt-transport-https
gnupg : provides tools for encrypting and signing data and communications.
apt-transport-https : enables APT to retrieve its data via HTTPS.
Then installed the GPG key
sudo curl -s https://packages.wazuh.com/key/GPG-KEY-WAZUH | sudo gpg --no-default-keyring --keyring gnupg-ring:/usr/share/keyrings/wazuh.gpg --import && sudo chmod 644 /usr/share/keyrings/wazuh.gpg
Next I added the repository.
sudo echo "deb [signed-by=/usr/share/keyrings/wazuh.gpg] https://packages.wazuh.com/4.x/apt/ stable main" | sudo tee -a /etc/apt/sources.list.d/wazuh.list
Updated the packages.
sudo apt-get update
Finally, installed the Wazuh indexer.
sudo apt-get -y install wazuh-indexer
Configuring The Indexer
Next, I needed to make some changes to the opensearch.yml.
sudo nano /etc/wazuh-indexer/opensearch.yml
network.host : I changed to this server’s IP address.
node.name : I decided to name it the same as this server to cause less confusion.
cluster.initial_master_nodes : I’m not creating a cluster, so I named it the same.
cluster.name : Kept it simple by calling it cluster.wazuh
node.max_local_storage_nodes : The default was 3 but I changed it to 1 since I will only have 1 server.
					network.host: "10.33.99.81"
node.name: "wazuh-indexer"
cluster.initial_master_nodes:
- "wazuh-indexer"
#- "node-2"
#- "node-3"
cluster.name: "cluster.wazuh"
#discovery.seed_hosts:
#  - "node-1-ip"
#  - "node-2-ip"
#  - "node-3-ip"
node.max_local_storage_nodes: "1"
Deploying Certificates
Then I set an environment variable for ‘NODE_NAME‘ to the value of my server’s hostname.
NODE_NAME=wazuh-indexer
Then I extracted the certificate and keys for the node, administrator, and root CA from ‘wazuh-certificates.tar‘.
sudo tar -xf ./wazuh-certificates.tar -C /etc/wazuh-indexer/certs/ ./$NODE_NAME.pem ./$NODE_NAME-key.pem ./admin.pem ./admin-key.pem ./root-ca.pem
x : stands for extract.
f : specifies the following string is the name of the tar archive to work with.
-C /etc/wazuh-indexer/certs/ : this is the tar archive file that contains the certificates and keys.
Then I renamed ingest.wazuh.lan.pem file to ‘indexer.pem‘.
sudo mv -n /etc/wazuh-indexer/certs/$NODE_NAME.pem /etc/wazuh-indexer/certs/indexer.pem
-n : makes it so the command will not overwrite an existing file.
I renamed the ingest.wazuh.lan-key.pem to ‘indexer-key.pem‘.
sudo mv -n /etc/wazuh-indexer/certs/$NODE_NAME-key.pem /etc/wazuh-indexer/certs/indexer-key.pem
I then modified the permissions so only the owner can read and write to the directory.
sudo chmod 500 /etc/wazuh-indexer/certs
5 : is in the owner’s field, and gives them read and execute permissions.
0 : in the group field means no permissions for the group.
0 : is in the other’s field means no permissions for others.
I then made the files within the directory only readable by the owner.
sudo sh -c 'chmod 400 /etc/wazuh-indexer/certs/*'
4 : is in the owner’s field, and gives them read and permissions.
0 : in the group field means no permissions for the group.
0 : is in the other’s field means no permissions for others.
I then made ‘wazuh-indexer‘ the owner of the directory.
sudo sh -c 'chmod 400 /etc/wazuh-indexer/certs/*'
Modifying Memory
First I need to open ‘opensearch.yml‘ to edit it,
sudo nano /etc/wazuh-indexer/opensearch.yml
Then I added the following line at the bottom of the file. This instructs the system to lock the memory, so it prevents the memory from being swapped to disk.
bootstrap.memory_lock: true
Next I needed to edit the service file.
sudo nano /usr/lib/systemd/system/wazuh-indexer.service
I then pasted the following line underneath the [Service] section.
LimitMEMLOCK=infinity
Then I modified the options file.
sudo nano /etc/wazuh-indexer/jvm.options
I then changed it to use 4g (4 Gigs of ram, instead of the default 1 Gig).
					# Xms represents the initial size of total heap space
# Xmx represents the maximum size of total heap space
-Xms4g
-Xmx4g
Starting the Service
First I reloaded the systemd manager configuration.
sudo systemctl daemon-reload
I then specified for the wazuh-indexer to start upon boot.
sudo systemctl enable wazuh-indexer
Finally I started the wazuh-indexer service.
sudo systemctl start wazuh-indexer
Initialize Cluster
I then ran the following command to load the new certificates information and start my single-node cluster.
sudo /usr/share/wazuh-indexer/bin/indexer-security-init.sh
Wazuh Server
Install
I did all the same prerequisites as I did for the Wazuh Indexer (Initial Server Configuration, Creating SSH Key)
Then I installed the following packages.
apt-get install gnupg apt-transport-https
Then I installed the GPG key.
curl -s https://packages.wazuh.com/key/GPG-KEY-WAZUH | gpg --no-default-keyring --keyring gnupg-ring:/usr/share/keyrings/wazuh.gpg --import && chmod 644 /usr/share/keyrings/wazuh.gpg
And added it to the repository.
echo "deb [signed-by=/usr/share/keyrings/wazuh.gpg] https://packages.wazuh.com/4.x/apt/ stable main" | tee -a /etc/apt/sources.list.d/wazuh.list
I then updated the packages.
sudo apt update
Finally, I installed the wazuh-manager.
sudo apt -y install wazuh-manager
Starting the Service
First I reloaded the systemd manager configuration.
sudo systemctl daemon-reload
I then specified for the wazuh-manager to start upon boot.
sudo systemctl enable wazuh-manager
Finally, I started the wazuh-manager service.
sudo systemctl start wazuh-manager
Filebeat Install
First I installed Filebeat.
sudo apt -y install filebeat
Filebeat Configuraiton
Then I downloaded a preconfigured Filebeat yml.
sudo curl -so /etc/filebeat/filebeat.yml https://packages.wazuh.com/4.7/tpl/wazuh/filebeat/filebeat.yml
Then edited it.
sudo nano /etc/filebeat/filebeat.yml
I then entered the IP for my Wazuh-Indexer server.
					# Wazuh - Filebeat configuration file
 output.elasticsearch:
 hosts: ["10.33.99.81:9200"]
 protocol: https
 username: ${username}
 password: ${password}
Then created a keystore for Filebeat.
filebeat keystore create
Then I securely stored the username ‘admin‘.
sudo echo admin | sudo filebeat keystore add username --stdin --force
As well as the password ‘admin‘.
sudo echo admin | sudo filebeat keystore add password --stdin --force
I then downloaded the alerts template.
curl -so /etc/filebeat/wazuh-template.json https://raw.githubusercontent.com/wazuh/wazuh/v4.7.4/extensions/elasticsearch/7.x/wazuh-template.json
I then modified the json file so that it can be read by other users.
sudo chmod go+r /etc/filebeat/wazuh-template.json
Then I installed the Wazuh module for Filebeat.
sudo curl -s https://packages.wazuh.com/4.x/filebeat/wazuh-filebeat-0.3.tar.gz | tar -xvz -C /usr/share/filebeat/module
Deploying Certificates
To deploy the certificates, I need to get the one I created on the wazuh-indexer server.
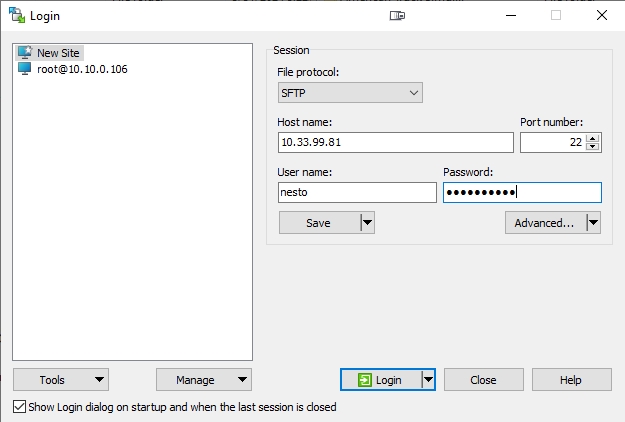
I opened WinSCP and logged into my wazuh-indexer server.

I then copied the wazuh-certificates.tar file.

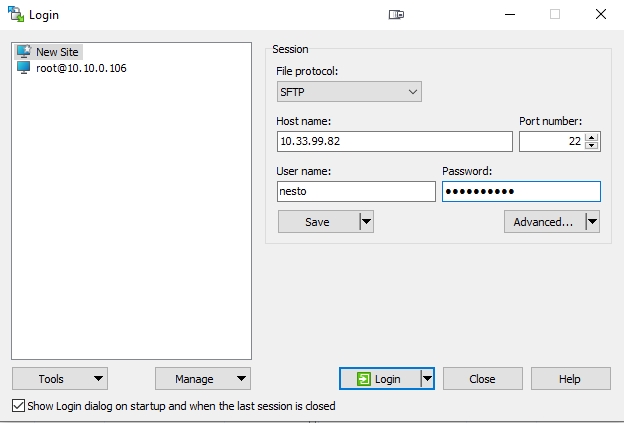
Then I logged into my wazuh-server server.

And copied the file into my home/user directory.

Then I did the same commands I did with the wazuh-indexer server. Replacing wazuh-indexer with wazuh-server.
					NODE_NAME=wazuh-server
sudo mkdir /etc/filebeat/certs
tar -xf ./wazuh-certificates.tar -C /etc/filebeat/certs/ ./$NODE_NAME.pem ./$NODE_NAME-key.pem ./root-ca.pem
mv -n /etc/filebeat/certs/$NODE_NAME.pem /etc/filebeat/certs/filebeat.pem
mv -n /etc/filebeat/certs/$NODE_NAME-key.pem /etc/filebeat/certs/filebeat-key.pem
sudo chmod 500 /etc/filebeat/certs
sudo sh -c 'chmod 400 /etc/filebeat/certs/*'
sudo chown -R root:root /etc/filebeat/certs
Deploying Certificates
Starting the service is similar to the wazuh-indexer.
					systemctl daemon-reload
systemctl enable filebeat
systemctl start filebeat
To test if everything installed correctly I ran the following command.
sudo filebeat test output
Wazuh Dashboard
Install
First I installed the following packages.
apt-get install gnupg apt-transport-https
I then downloaded the GPG keys.
curl -s https://packages.wazuh.com/key/GPG-KEY-WAZUH | gpg --no-default-keyring --keyring gnupg-ring:/usr/share/keyrings/wazuh.gpg --import && chmod 644 /usr/share/keyrings/wazuh.gpg
I then downloaded the GPG keys.
echo "deb [signed-by=/usr/share/keyrings/wazuh.gpg] https://packages.wazuh.com/4.x/apt/ stable main" | tee -a /etc/apt/sources.list.d/wazuh.list
Then updated packages.
sudo apt-get update
Then installed the wazuh-dashboard.
sudo apt-get -y install wazuh-dashboard
Configuring Dashboard
First I edited the ‘opensearch_dashboards.yml‘ file.
sudo nano /etc/wazuh-dashboard/opensearch_dashboards.yml
server.host : I changed it to this server’s IP address.
server.port : I left the default 443
opensearch.hosts : I changed it from ‘localhost’ to the domain name I setup earlier.
					   server.host: 10.33.99.83
   server.port: 443
   opensearch.hosts: https://ingest.wazuh.lan:9200
   opensearch.ssl.verificationMode: certificate
Deploying Certificates
Same concept as before when I setup certificates for the Wazuh-Server so I won’t go into the details.
					NODE_NAME=wazuh-dashboard
sudo mkdir /etc/wazuh-dashboard/certs
sudo tar -xf ./wazuh-certificates.tar -C /etc/wazuh-dashboard/certs/ ./$NODE_NAME.pem ./$NODE_NAME-key.pem ./root-ca.pem
sudo mv -n /etc/wazuh-dashboard/certs/$NODE_NAME.pem /etc/wazuh-dashboard/certs/dashboard.pem
sudo mv -n /etc/wazuh-dashboard/certs/$NODE_NAME-key.pem /etc/wazuh-dashboard/certs/dashboard-key.pem
sudo chmod 500 /etc/wazuh-dashboard/certs
sudo sh -c 'chmod 400 /etc/wazuh-dashboard/certs/*'
sudo chown -R wazuh-dashboard:wazuh-dashboard /etc/wazuh-dashboard/certs
Starting the Service
Same concept as before when I setup Wazuh-Indexer so I won’t go into the details.
					sudo systemctl daemon-reload
sudo systemctl enable wazuh-dashboard
sudo systemctl start wazuh-dashboard
Since I setup separate servers for all the services, I need to edit the wazuh.yml file.
sudo nano /usr/share/wazuh-dashboard/data/wazuh/config/wazuh.yml
I then replaced ‘localhost‘ with the IP for the wazuh-server.
					hosts:
  - default:
      url: https://10.33.99.82
      port: 55000
      username: wazuh-wui
      password: wazuh-wui
      run_as: false
Accessing Web UI
Now I can navigate to https://10.33.99.83. to access the Web UI and login with the default username of admin and password of admin.

