Table of Contents
In this blog, I will show how I configured BookStack as an application within Microsoft 365, enabling user authentication through Microsoft Authenticator, as well only giving access to users that belong to a specific group.
Screenshots
-
Domain Setup
Cloudflare Configuration
01. I first added an 'A record' for the subdomain 'wiki', and entered my public IP, then clicked 'Save'.

Nginx Configuration
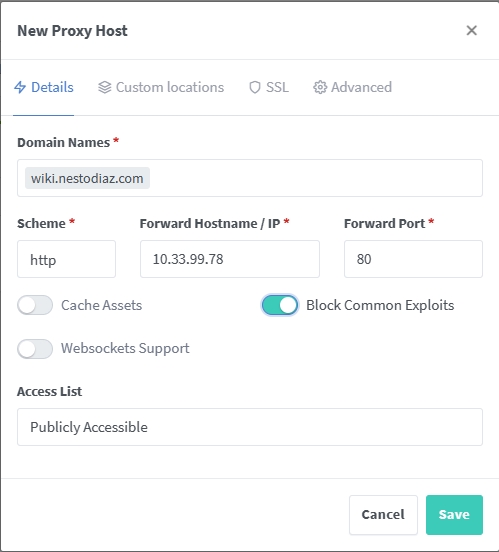
02. I then added a new proxy host, typed in the domain I setup on Cloudflare, then entered the private IP address for the bookstack server, with port 80.
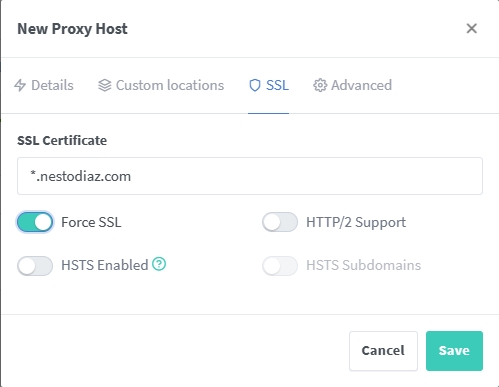
03. Then clicked on the 'SSL' tab, selected my SSL certificate, checked 'Force SSL' and clicked 'Save'.
-
Server Prerequisites
Update PHP
04. First thing is to update packages.
apt-get update
05. Then I installed the following packages.
apt-get -y install apt-transport-https lsb-release ca-certificates curl
06. I then downloaded the GPG signing key for the Sury PHP repository, and saved it to ‘usr/share/keyrings‘.
curl -sSLo /usr/share/keyrings/deb.sury.org-php.gpg https://packages.sury.org/php/apt.gpg
07. Then I set up a new APT source list file for the PHP packages provided by Surý’s repository.
sh -c 'echo "deb [signed-by=/usr/share/keyrings/deb.sury.org-php.gpg] https://packages.sury.org/php/ $(lsb_release -sc) main" > /etc/apt/sources.list.d/php.list'
08. Then updated the packages again.
apt-get update
09. Then I installed PHP 8.1 with the modules needed for the rest of the installation.
apt install php8.1 php8.1-{curl,gd,ldap,mbstring,mcrypt,mysql,xml}
10. Then I checked the version of PHP to make sure it is now updated.
php -v
Install MariaDB
11. I then installed MariaDB.
apt install default-mysql-server
Install GIT
12. And installed Git next.
apt install git
Install Composer
13. I then downloaded the Composer installer and saved it with the name 'composer.setup.php'.
php -r "copy('https://getcomposer.org/installer', 'composer-setup.php');"
14. Then I checked the integrity of the downloaded file against a known hash.
php -r "if (hash_file('sha384', 'composer-setup.php') === 'dac665fdc30fdd8ec78b38b9800061b4150413ff2e3b6f88543c636f7cd84f6db9189d43a81e5503cda447da73c7e5b6') { echo 'Installer verified'; } else { echo 'Installer corrupt'; unlink('composer-setup.php'); } echo PHP_EOL;"
15. Then I installed composer.
php composer-setup.php
16. I then deleted the installer.
php -r "unlink('composer-setup.php');"
17. I then moved composer.phar to '/usr/local/bin/' and renamed it to just 'composer'.
mv composer.phar /usr/local/bin/composer
18. Then I checked to make sure the latest version of composer was installed.
composer -V
Install Apache
19. I then installed apache.
apt install apache2
20. And started the service.
systemctl status apache2.service
-
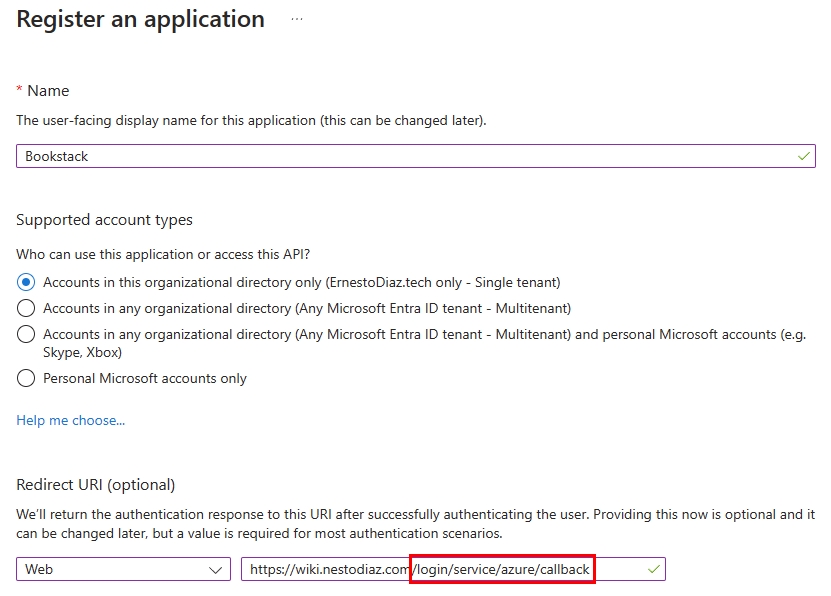
Bookstack Installation
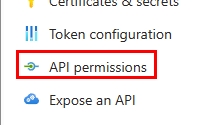
Server Setup
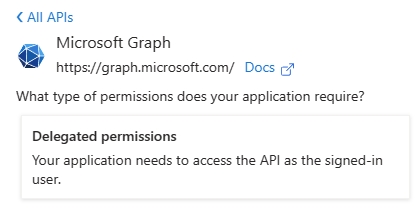
21. First I changed to the /var/www/ directory.
cd /var/www/
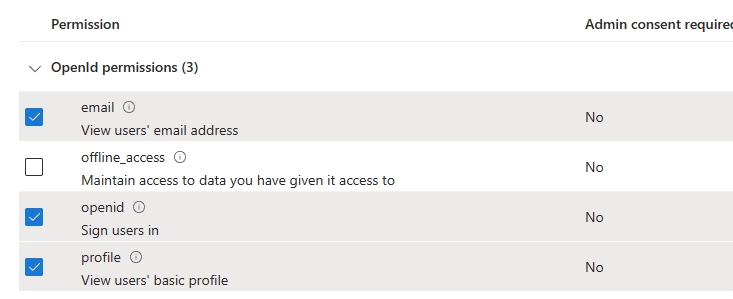
22. I then downloaded the latest working branch into the directory called 'bookstack'.
git clone https://github.com/BookStackApp/BookStack.git --branch release --single-branch bookstack
23. I then moved into that directory.
cd bookstack/
24. Then installed the PHP extension for zip.
apt install php8.1-zip
25. Then installed the necessary libraries and dependencies defined in a project's composer.json file.
composer install --no-dev
26. I then copied the '.env.example' file to a new file called '.env'.
cp .env.example .env
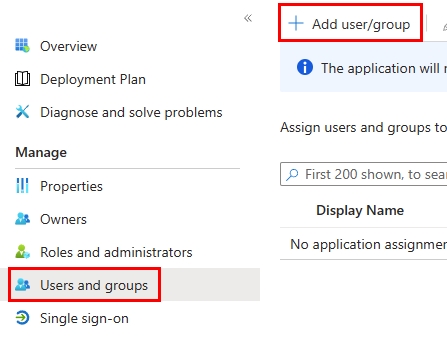
27. I then logged into MySql as root.
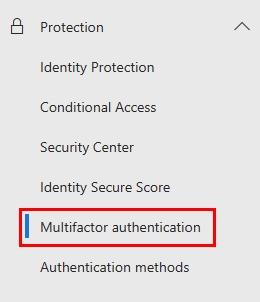
mysql -u root
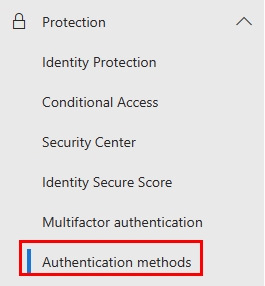
28. I created a database for Bookstack.
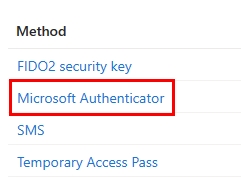
create database bookstack;
29. I verified the database was created.
show databases;
30. I then created a user named 'bookstack', and setup a password for that user.
create user bookstack@localhost identified by 'password';
31. Then granted all privileges to that user.
grant all privileges on bookstack.* to bookstack@localhost;
32. Then reloaded the privileges so they take effect.
flush privileges;
33. Then exited.
ctrl+D
34. Next I edited the .env file I copied earlier.
nano .env
35. I entered the URL for this app, then added the username 'bookstack' and database 'bookstack', along with the password I setup earlier.
					# This file, when named as ".env" in the root of your BookStack install
# folder, is used for the core configuration of the application.
# By default this file contains the most common required options but
# a full list of options can be found in the '.env.example.complete' file.

# NOTE: If any of your values contain a space or a hash you will need to
# wrap the entire value in quotes. (eg. MAIL_FROM_NAME="BookStack Mailer")

# Application key
# Used for encryption where needed.
# Run `php artisan key:generate` to generate a valid key.
APP_KEY=base64:6E/U6eSSXbDaEiJDIgoxxxxxxxx

# Application URL
# This must be the root URL that you want to host BookStack on.
# All URLs in BookStack will be generated using this value
# to ensure URLs generated are consistent and secure.
# If you change this in the future you may need to run a command
# to update stored URLs in the database. Command example:
# php artisan bookstack:update-url https://old.example.com https://new.example.com
APP_URL=https://wiki.nestodiaz.com

# Database details
DB_HOST=localhost
DB_DATABASE=bookstack
DB_USERNAME=bookstack
DB_PASSWORD=password
36. Then I made sure the web server has the proper permissions to read, write, and manage files in these directories
chown -R www-data:www-data bootstrap/cache public/uploads storage
37. Then ran the following command to regenerate the APP_KEY value in the .env file.
php artisan key:generate
38. I then navigated to the directory where Apache's available site configurations are stored.
cd /etc/apache2/sites-available
39. I then edited the bookstack conf file.
nano bookstack.conf
40. I made sure the server name matched to the one I set earlier.
					<VirtualHost *:80>

	# This is a simple example of an Apache VirtualHost configuration
	# file that could be used with BookStack.
	# This assumes mod_php has been installed and is loaded.
	#
	# Change the "docs.example.com" usage in the "ServerName" directive
	# to be your web domain for BookStack.
	#
	# Change the "/var/www/bookstack/public/", used twice below, to the
	# location of the "public" folder within your BookStack installation.
	#
	# This configuration is only for HTTP, Not HTTPS.
	# For HTTPS we recommend using https://certbot.eff.org/

	ServerName https://wiki.nestodiaz.com
	DocumentRoot /var/www/bookstack/public/

	<Directory /var/www/bookstack/public/>
		Options Indexes FollowSymLinks
		AllowOverride None
		Require all granted
		<IfModule mod_rewrite.c>
			<IfModule mod_negotiation.c>
				Options -MultiViews -Indexes
			</IfModule>

			RewriteEngine On

			# Handle Authorization Header
			RewriteCond %{HTTP:Authorization} .
			RewriteRule .* - [E=HTTP_AUTHORIZATION:%{HTTP:Authorization}]

			# Redirect Trailing Slashes If Not A Folder...
			RewriteCond %{REQUEST_FILENAME} !-d
			RewriteCond %{REQUEST_URI} (.+)/$
			RewriteRule ^ %1 [L,R=301]

			# Handle Front Controller...
			RewriteCond %{REQUEST_FILENAME} !-d
			RewriteCond %{REQUEST_FILENAME} !-f
			RewriteRule ^ index.php [L]
		</IfModule>
	</Directory>

	ErrorLog ${APACHE_LOG_DIR}/error.log
	CustomLog ${APACHE_LOG_DIR}/access.log combined

</VirtualHost>
41. I then enabled the site.
a2ensite bookstack.conf
42. I made sure to activate the mod_rewrite module.
a2enmod rewrite
43. I also activated the php8.1 module.
a2enmod php8.1
44. Then restarted apache.
systemctl restart apache2
45. Then navigated bcak to this directory.
cd /var/www/bookstack
46. Lastly applied database migration to the currently configured database.
php artisan migrate
Accessing Bookstack
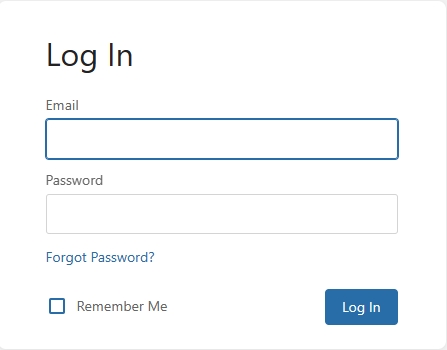
47. I am now able to login using the domain I setup at the very beginning.
Increasing File Upload Limit
48. I moved to the following directory.
cd /etc/php/8.1/apache2
49. I then edited the php.ini file.
nano php.ini
50. Then increased the following to 100M.
					post_max_size = 100M
upload_max_filesize = 100M
-
SAML Setup
Entra ID
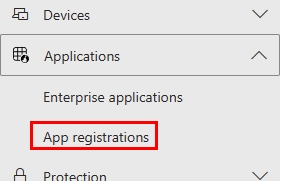
51. To setup SAML I first went to Entra Identity and on the left-side menu I went to Applications > App registrations.
52. I registered a new application by giving it a name, on Redirect URL I made sure to select 'Web' from the drop-down menu, and entered my domain followed by '/login/service/azure/callback'.
53. I then needed to give API permissions to OID. I then clicked on the Bookstack application I just created, and went to API permissions from the left-side menu.
54. Clicked Microsoft Graph.

55. Then clicked Delegated permissions.
56. I checked the following 3 and saved.
57. I then noted the 'Application ID' for use later.

Client Secret
58. Next I need to create a client secret, so I went to 'Certificates & secrets' and I gave it an expiration date of 730 days.

59. Then noted the value. This is the only time you'll be able to view it, so make sure to save it before going to a different page.

60. Then I also copied the OpenID Connect URL, which can be found in the 'Overview' section and it'll be in Endpoints in the top ribbon.

61. I then pasted the following into the .env file, while also changing the OIDC_CLIENT_ID, OIDC_CLIENT_SECRET, and OIDC_ISSUER with the items I copied earlier.
					# Set OIDC to be the authentication method
AUTH_METHOD=oidc

# Control if BookStack automatically initiates login via your OIDC system
# if it's the only authentication method. Prevents the need for the
# user to click the "Login with x" button on the login page.
# Setting this to true enables auto-initiation.
AUTH_AUTO_INITIATE=false

# Set the display name to be shown on the login button.
# (Login with <name>)
OIDC_NAME=SSO

# Name of the claims(s) to use for the user's display name.
# Can have multiple attributes listed, separated with a '|' in which
# case those values will be joined with a space.
# Example: OIDC_DISPLAY_NAME_CLAIMS=given_name|family_name
OIDC_DISPLAY_NAME_CLAIMS=name

# OAuth Client ID to access the identity provider
OIDC_CLIENT_ID=abc123

# OAuth Client Secret to access the identity provider
OIDC_CLIENT_SECRET=def456

# Issuer URL
# Must start with 'https://'
OIDC_ISSUER=https://instance.authsystem.example.com

# The "end session" (RP-initiated logout) URL to call during BookStack logout.
# By default this is false which disables RP-initiated logout.
# Setting to "true" will enable logout if found as supported by auto-discovery.
# Otherwise, this can be set as a specific URL endpoint.
OIDC_END_SESSION_ENDPOINT=false

# Enable auto-discovery of endpoints and token keys.
# As per the standard, expects the service to serve a
# `<issuer>/.well-known/openid-configuration` endpoint.
OIDC_ISSUER_DISCOVER=true
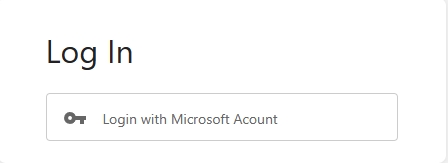
62. Now the login page will show to login with a Microsoft Account.
-
Access Restriction
Identity Group
63. To only allow certain people access to the wiki, you can create a group in Identity.
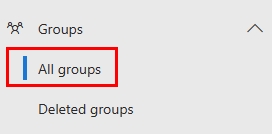
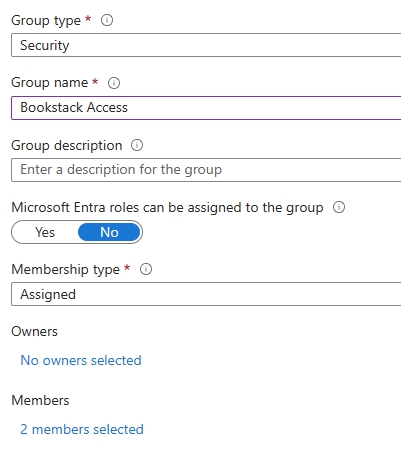
64. Make it a Security group, and add the users or groups for who you want to have access.
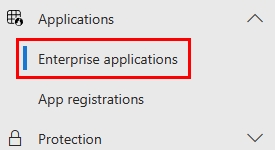
65. Then go back to 'Enterprise applications' and click on Bookstack.
66. From there go to 'Users and groups' and then add the group you just created.
Multifactor Authentication
67. To setup 2FA for only this wiki, I went to Protection > Multifactor authentication.
68. To setup 2FA for only this wiki, I went to Protection > Authentication methods.
69. I selected Microsoft Authenticator from the list.
70. I added the group I made for Bookstack, and then set the 'Authentication mode'.

